Simple UI Mode
Select Software
Application Type
Project Summary
Test Run
Finish
Upload Project
Test Run with Online Activation
Test Run with Manual Activation
Finish with Online Information
Manage Serial Number
e-commerce integration
In this Quick Start tutorial, we only work in the simple mode to go through the whole process very quickly.
New Project
Let's press the New Button to create a new license project, the IDE goes to the next "New Project" step:

We select the default trial period of 30 days, and press Next Button, now the IDE goes to the Select Software step:
Select Software

Here, you can browse and select the folder of the software binaries to protect, in this tutorial, we specify the folder containing the Notepad2 executable. All files and sub-folders under the specified folder will be assumed as part of application.
Once the software folder is specified, the IDE will parse the folder for all executables and let you select which one is the start-up executable. In our case, the only exe is selected automatically for us.
Now, press Next button to go to the "Application Type" step:
Application Type
SoftwareShield can protect various kinds of applications, the IDE only displays most common types and this information can help IDE initialize the project settings in smart and efficient manner.

Even if your application does not fall into the listed application types, you might also protect your software. Because Notepad2 is a native executable (not developed for .Net) so we just press Next button to next Summary page.
Project Summary
Before the project is physically created, the summary page presents you the most important project settings you have specified in the previous steps, if everything seems ok, then we can now press \emph{Next} button to generate the project folders and files for the new project.

Please note that the new project will be created at Project Directory, in this tutorial the new project layout looks like this:

The file Notepad2.lpj is our project file. In the "Src" sub-folder you will find the Notepad2.exe copied from the original application directory.
Immediately after the IDE has created the new project layout, it triggers the first-time build of the new project automatically, you can see detailed build messages logged in the scrolling edit box.

if everything is ok, the IDE will bring you to the next \emph{Test Run} step.
Test Run
The IDE comes to test run page; now that you have built the new project successfully, it's the time to give it a quick shot to see if the wrapped application does work as expected, you should make sure that:
- The wrapped application can launch properly;
- The built-in license model works as expected;
- the wrapped application has the same behaviour as the original one;
- The wrapped application can exit normally;

Press the Launch button now, while the wrapped Notepad2.exe is launching, the IDE's UI changes a little, waiting for your feedback of the first test run:

The wrapped Notepad2.exe launches with a standard welcome screen:

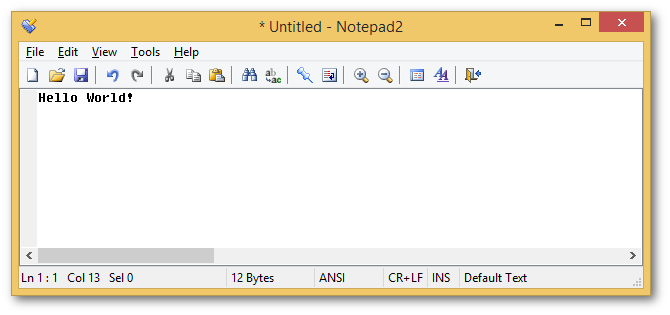
It displays the current license status, we have 30 days left, now press Launch button to run the application, you should be able to see the notepad2 main window working as normal:
Press "Alt+F4" or menu item "File => Exit" to terminate the Notepad2 application, you will immediately see another App-Exiting screen pops up:

So it seems the wrapped notepad2 does not crash on starting and exiting, the license UI looks normal, we will demonstrate how to activate the application later; at this stage we can tell the IDE that the test run is successful by selecting Yes and press Next button.
Finish
Now we have a working protected Notepad2, anyway we still have extra tasks to do, the IDE's simple mode presents you a roadmap on the finish page:

Upload Project
SoftwareShield provides license web hosting service so that you can activate your application online. When uploading license project for the first time, your application is registered at server side, if you change project settings or upgrade the application versions, you can rebuild the license project and the IDE will automatically synchronized the latest application license project with the server so that both the old and new product versions can be activated properly online.
If you do not upload the license project, the application can still be activated offline, however, it will need your extra customer support effort to generate activation code for individual customer request manually, which we will demonstrate in detail later.
To upload the project, please press Upload button on the finish GUI.

After downloading SoftwareShield, you will get a CheckPoint Liense Server account for your company (Company Login, Username and password), input your login information to the publish dialog and press Publish button:
In several seconds if everything works normally, you will see the publish success dialog:

Congratulations, now your project has been registered to SoftwareShield's cloud-based license server!
Press OK button to continue, another message box pops up as following:

After the license project is uploaded for the first time, one of the license project's internal tag changes from false to true to indicate that this license project is now synchronized with the server and can be activated online; because our previous test build does not reflect this important change so the IDE will rebuild the project after you close the message box.
Again, after the rebuild finishes, the IDE rewinds to the Test Run page, but this time, you can see an important change: a SN (serial number) "81EB-DDC0-4EFB-ABD7"!

For uploaded project, after each success building the SoftwareShield IDE will retrieve a test SN from CheckPoint server so you can QA and activate the wrapped application with the test SN.
Test Run with Online Activation
Now we have a valid test SN, let's test it by pressing Launch button. This time, we will try to activate Notepad2 online.
When the wrapped Notepad2 launches, press Activate button on the welcome screen, it bring us to the activation screen:

Input the test SN (81EB-DDC0-4EFB-ABD7) to the activation screen, press Activate button on the page, after several seconds, the screen displays success message and allow you to launch the fully unlocked Notepad2!

Test Run with Manual Activation
It's also possible to activate the demo in offline mode without a SN.

We will explain license revoke feature later, here we tries to test the offline activation by pressing the Offline button, it goes to the offline activation UI:

We generate the license code with Manual Activator software by browsing to the project's "Release\KeyGen\win" folder, double-click the "gsKeyGen.exe", and generate the license code as following:

Now we can copy and paste the generated license code to activation UI, and press Activate button, now the application is unlocked successfully!

Finish with Online Information
Now that the project has been fully unlocked, all license nag screens will be turned off, if you press "Launch" button to execute the wrapped notepad2 again, and press "Alt+F4" to terminate notepad2, there will no App-Exit screen pops up. To double-check the validity, you can even browse to the project's "Release\Deploy" folder, double-click the wrapped Notepad2.exe, it runs and goes to the editor UI immediately.
We give the positive feedback to the IDE by selecting "Yes" in the Test Run page, then the IDE goes to the Finish page again, however, this time all online features are available to you.
Finally, before completing our tutorial, let's examine the finish screen between, we can find more features are enabled for the project:

Manage Serial Number
SoftwareShield provides License Web hosting service, press Manage Serial Number button on the finish screen, the IDE will launch the default web browser and redirect you to the checkpoint server management web application login page:

After login with your valid account, you can manage all of your uploaded license projects, create serial numbers, monitor activations, etc.
e-commerce integration
Another important information displayed on the finish screen is Serial Generation Url, it is the URL to generate and retrieve SN for your SoftwareShield protected application.
The sample URL shown on the following image, when the username and password are replaced with your account credentials, you copy and paste the URL to a web browser, a valid SN will be created and displayed as a result.
https://shield.yummy.net/checkpoint2/CheckPointHttpGet.svc/GenerateSerialNumbers? companyLogin=[ENTER YOUR COMPANY NAME] &username=[ENTER YOUR USER NAME] &password=[ENTER PASSWORD HERE] &productId=e2a3b244-4cae-456b-8754-e68759b1a6d3 &entityId=e2c736b9-13a7-49df-895a-2d8dfceb593d &actionID=1

Basically, after a customer has made payment on your e-commerce provider's server, the server can call this URL to generate a SN for the customer at runtime.
For example, if you are integrating with Paypal, you can use this URL as callback of the Buy Now Paypal button, once the payment is processed successfully, the Paypal server will call your URL to generate a SN for the customer automatically.