Advanced UI Mode
Main UI
Project Information
Entity Information
Edit Entity
Add / Remove Entity
Build Project
Test Run 1: Offline Activation
Upload Project
Test Run 2: Online Activation
In this chapter we demonstrate how to work in SoftwareShield IDE's advanced UI.
You can download the original test game from Alphine Crawler as our test case. It is a free game and you can see how we can protect this game without accessing to its source code.
New Project
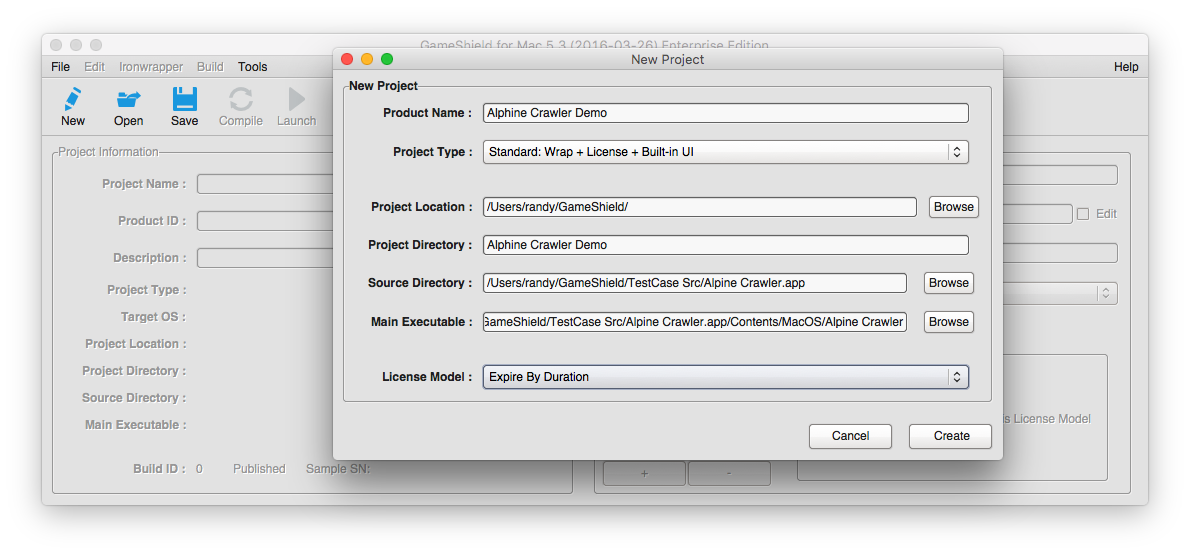
Click on the "New Project" button on toolbar:

On the new project dialog box, you input the following information:
-
Product Name
The name of your license project, please input a string containing ASCII only because it will be used as license project folder name and license file name by default.
-
Project Type
You can choose which kind of project to create, most likely the default one (Standard: Wrap + License + Built-in UI) works for you. Please refer to License Project Type for more details.
-
Project Location
Specify the folder to generate the whole license project. SoftwareShield IDE will create a project layout and make a copy of the app files in "Src/" sub-folder.
-
Project Directory
The name of the license project folder. By default it is the same as product name.
The final full path to the license project is: [Project Location]/[Project Directory]/
-
Source Directory
Specify where to copy your original game files.
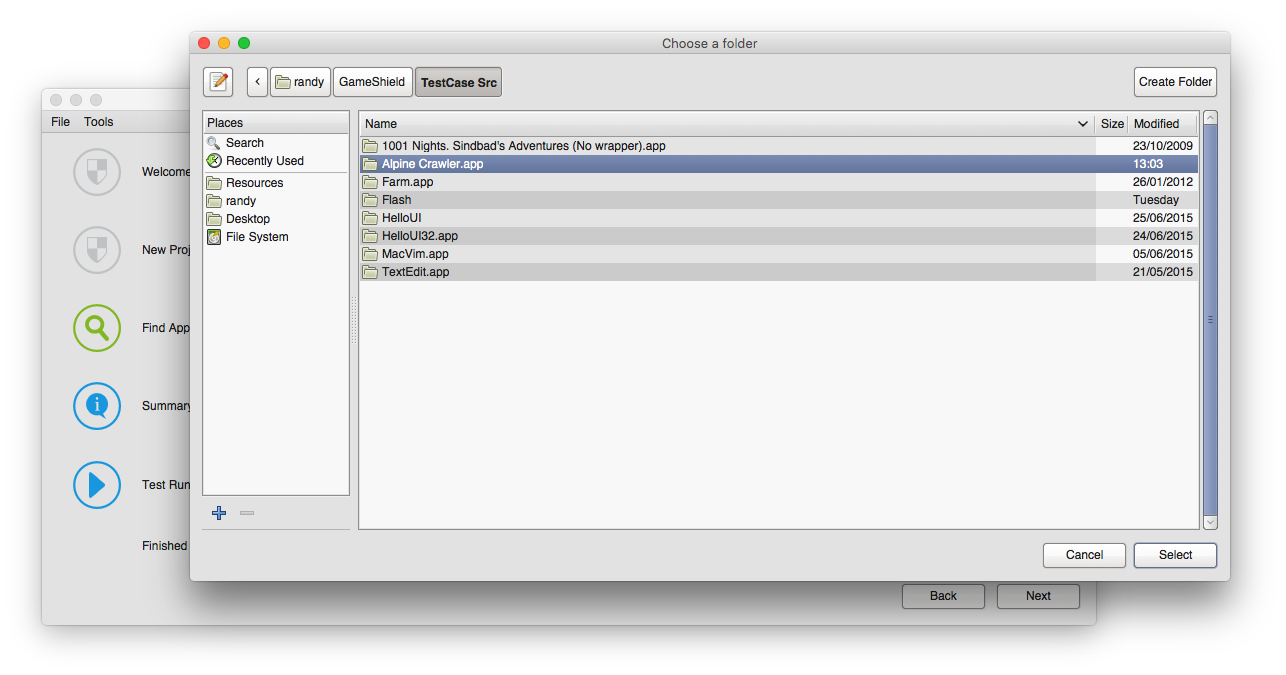
Click the "Browser" button, choose the root of game bundle as following:
-
Main Executable
Specify the starting executable of your game.
-
License Model
Specify which license model to protect the app (the first and default entity in your license project).
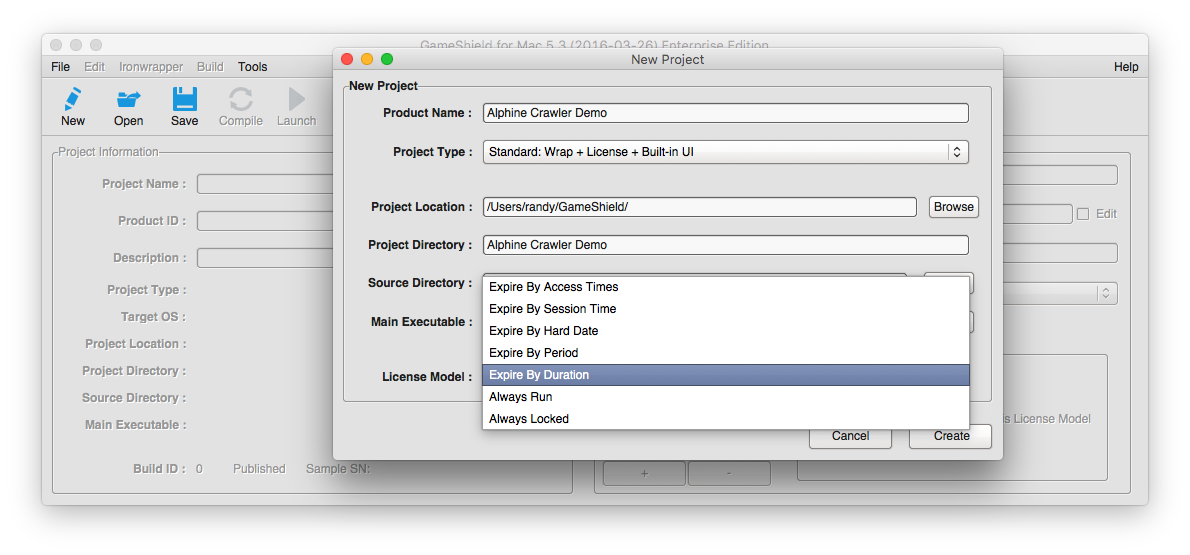
Please refer to License Models for details of all built-in license models.
Main UI
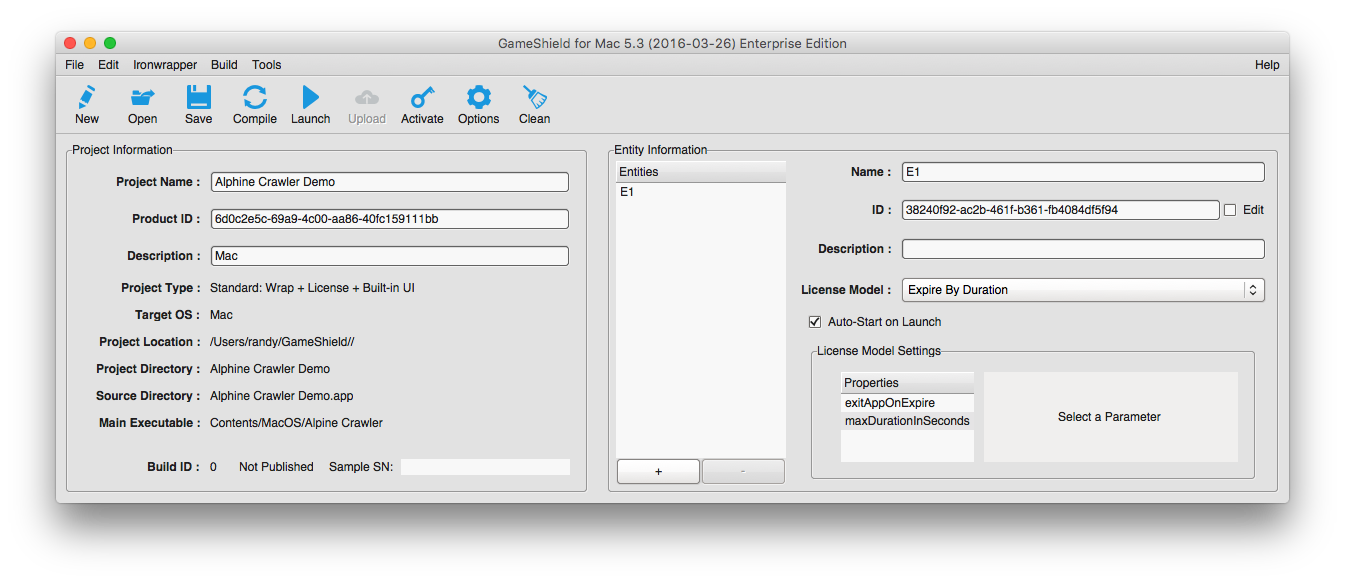
Clicks "Create" button, the IDE will create a new project in the specified project location and open the new project in the main UI as following:
Project Information
The main UI displays the current project settings on the left panel and entity information on the right side.
You can edit Product Name and Description here if needed, the Product ID field is read-only, SoftwareShield create a new GUID (global unique identifier) for each license project which should not be changed after the project is created.
Because we have not started building our project, the Build (Build ID) is 0;
Because we have not uploaded the new project, the publish status is "Not Published", and the test serial number for the current build is not available.
Entity Information
The Entity is one of the core concepts of SoftwareShield, it can be anything to protect (the whole app, a game level, a PDF chapter, one app feature, etc.), the SoftwareShield IDE creates an entity automatically for each new project.
For each entity, you must associate a built-in license model with it so it can be protected with correct license behavior.
Edit Entity
Click the entity to edit in the "Entities" list box, you can edit its properties and associated license model parameters.
-
Name
The entity name. It is a short-string label of the entity and is used in built-in license UI template.
-
Description (Optional)
The long string description of entity, it can be anything and not used in any SoftwareShield license logic.
-
ID
The GUID assigned to each entity. It is generated automatically by IDE and should not be modified.
- Auto-Start on Launch
Specify if the current entity is of an Auto Start Entity.
- License Model
Specify the built-in license model to protect the selected entity. Please refer to License Models for license details.
For each license model, you can modify its license parameters in the license parameters panel.
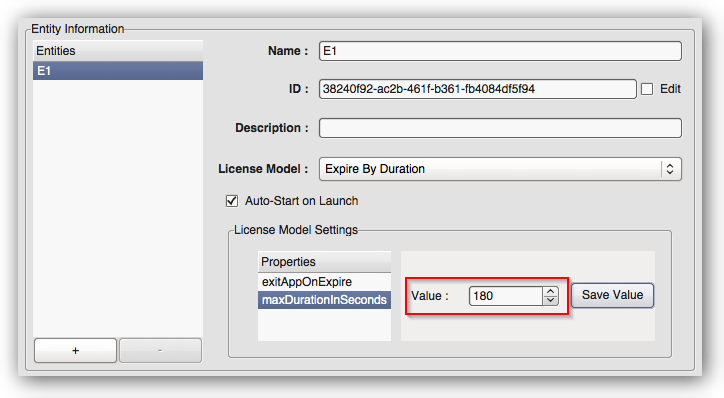
In this tutorial, we want to have a short trial period of 3 minutes, so we just click on the property named "maxDurationSeconds", and input "180" ( 3 x 60 = 180 seconds ) in its value field, clicks "Save Value".
Add / Remove Entity
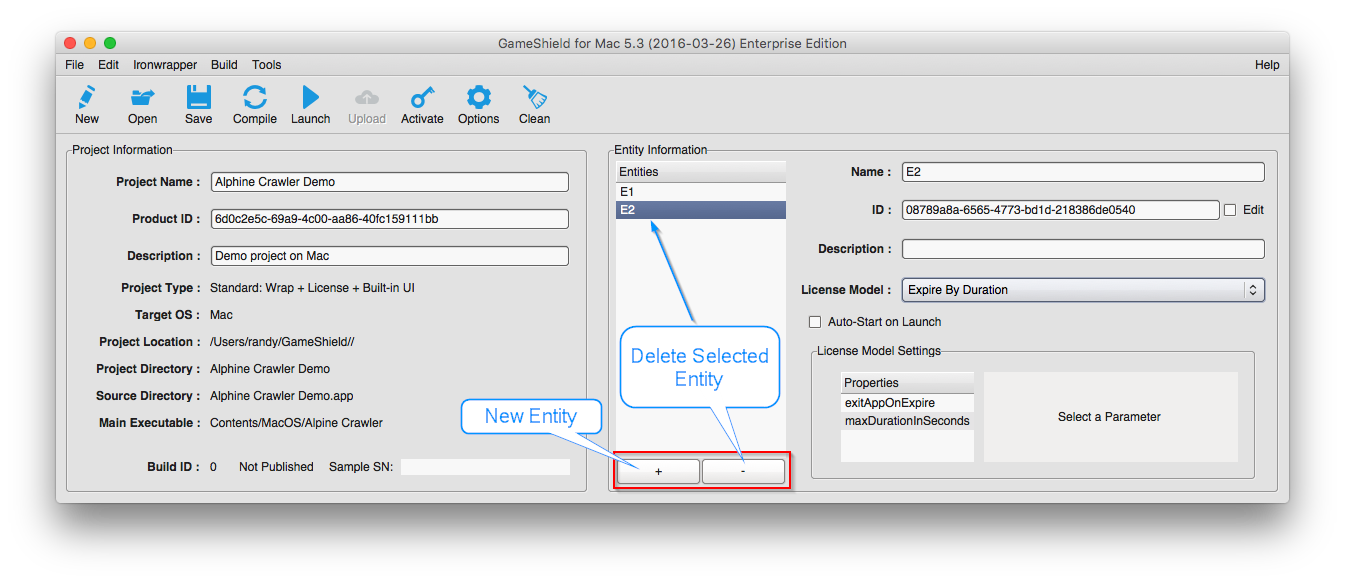
You can define multiple entities in a license project. To add an entity, simply clicks on the "+" button to add a new entity; to delete an entity, select the entity to delete in the "Entities" list box, and clicks the "-" button.
Build Project
Now it is time to build our license project.
Clicks "Compile" toolbar button, or clicks the menu item "Build => Build Project":
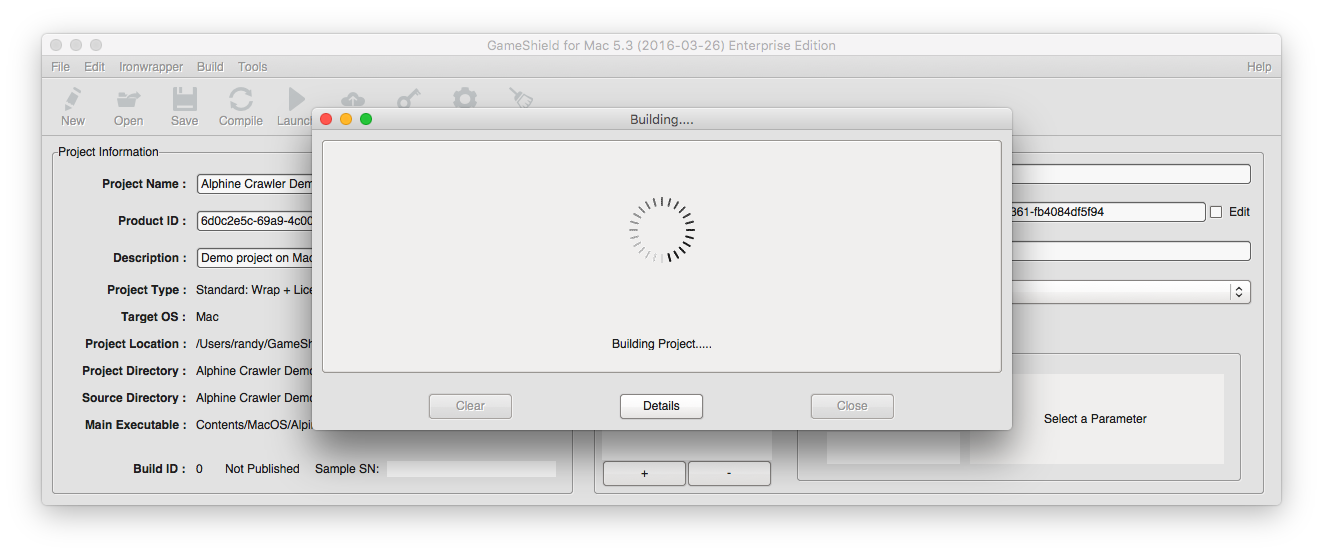
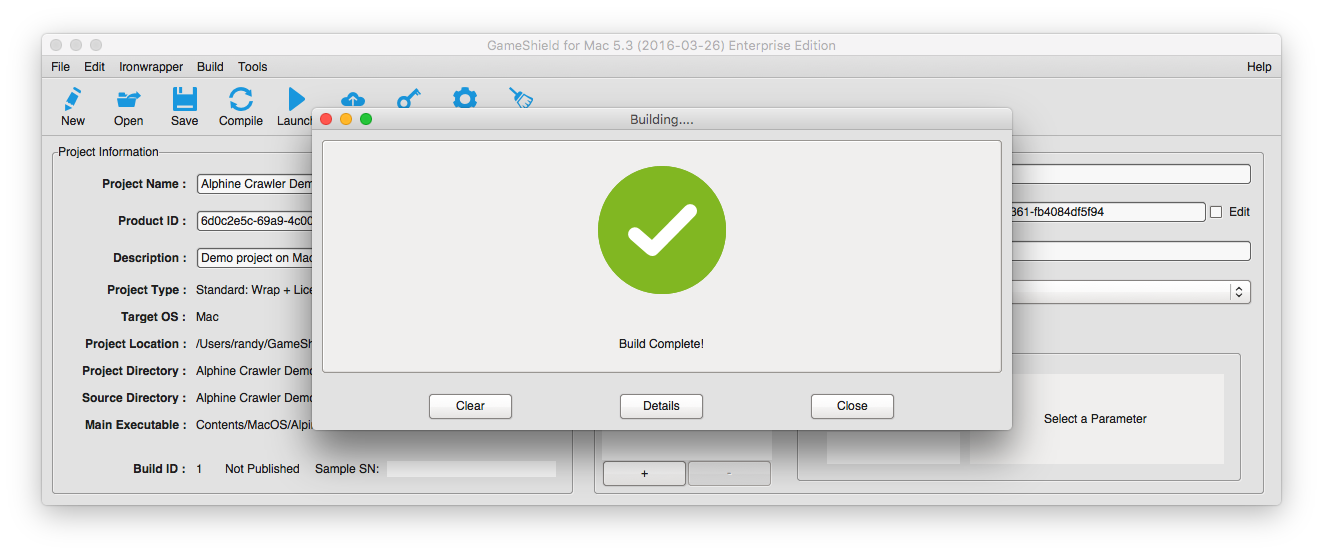
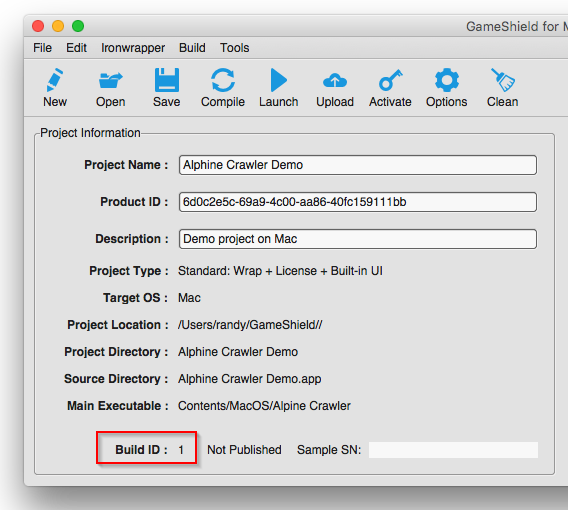
After the first successful build, you should see the project's build-id is already updated to "1":
Test Run 1: Offline Activation
Now that you have the first successful build of license project, it is time to run a quick test to see if everything works as expected.
Clicks the "Launch" button on the toolbar:

When the launch button is clicked on IDE, the IDE will:
- Cleanup existent local license storage for the current project, so that the app is always lauched as if it was just fresh installed and never runs before.
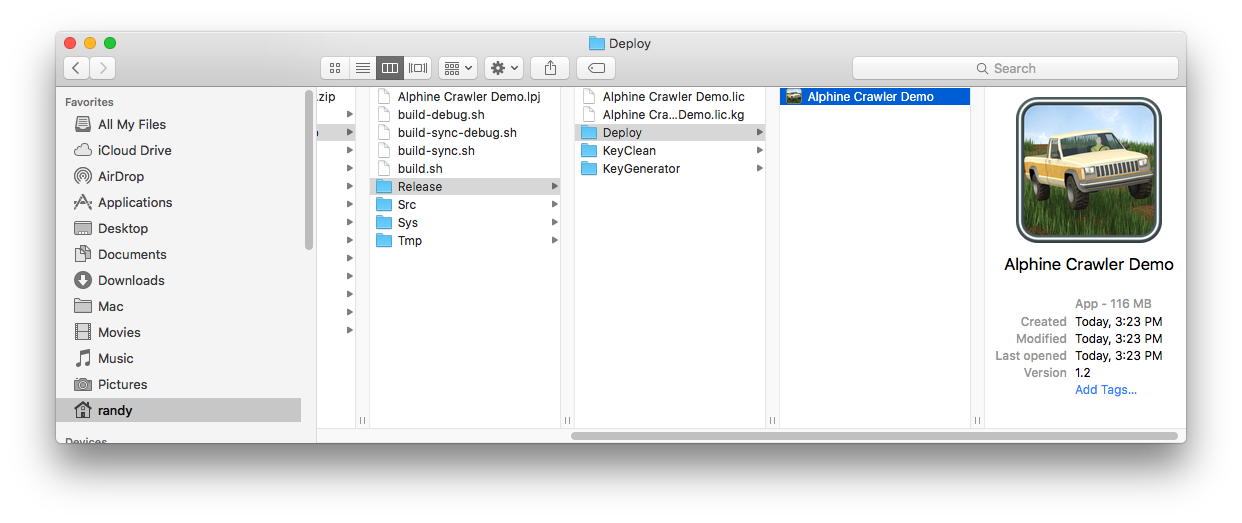
- The wrapped app bundle in the "LicenseProjectRoot/Release/Deploy/" folder is launched.
You can, of course, go to the project's Release/Deploy folder ( Menu: Build => Browse => Release Directory ), and double-click the app's icon in Finder, it will launch the app directly without license clean-up.
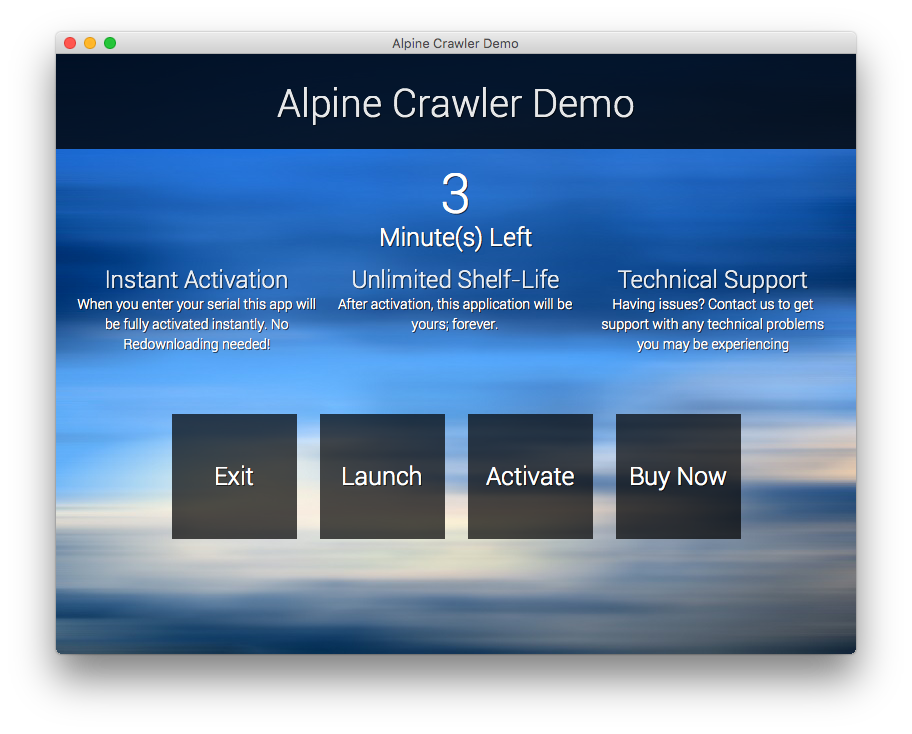
The test game starts up with the following license UI (UI_HTML/onStart.htm):
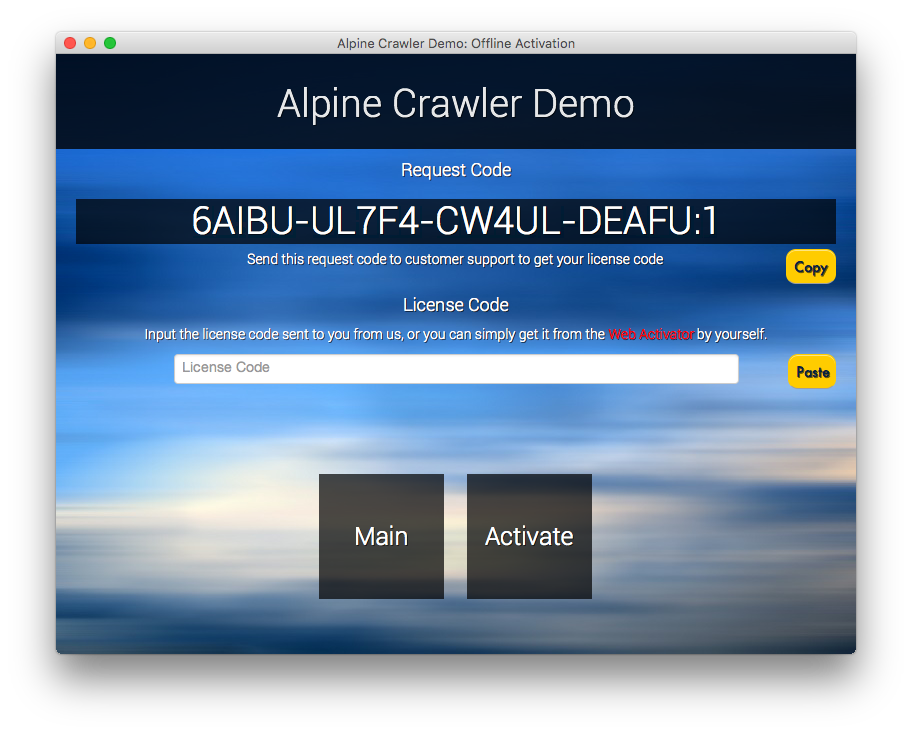
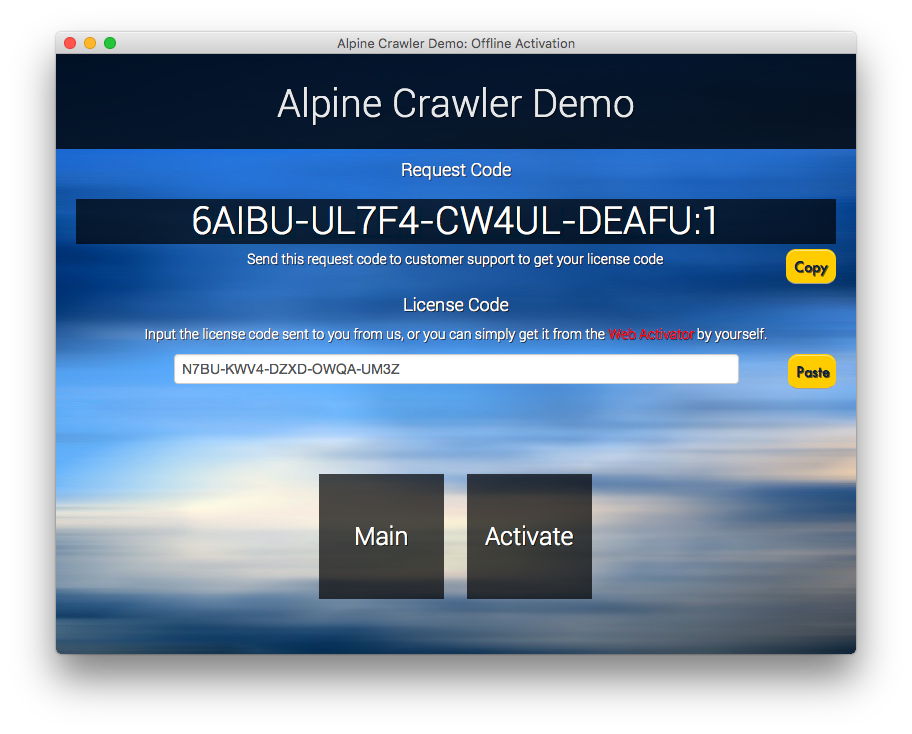
At this stage we have not uploaded license project so the CheckPoint server does not support online activation of this app, however, we can test offline activation by clicking the "Activate" button:
To generate license code, we invoke the app-specific Manual Activator from IDE (Menu Tools => Manual Activator):

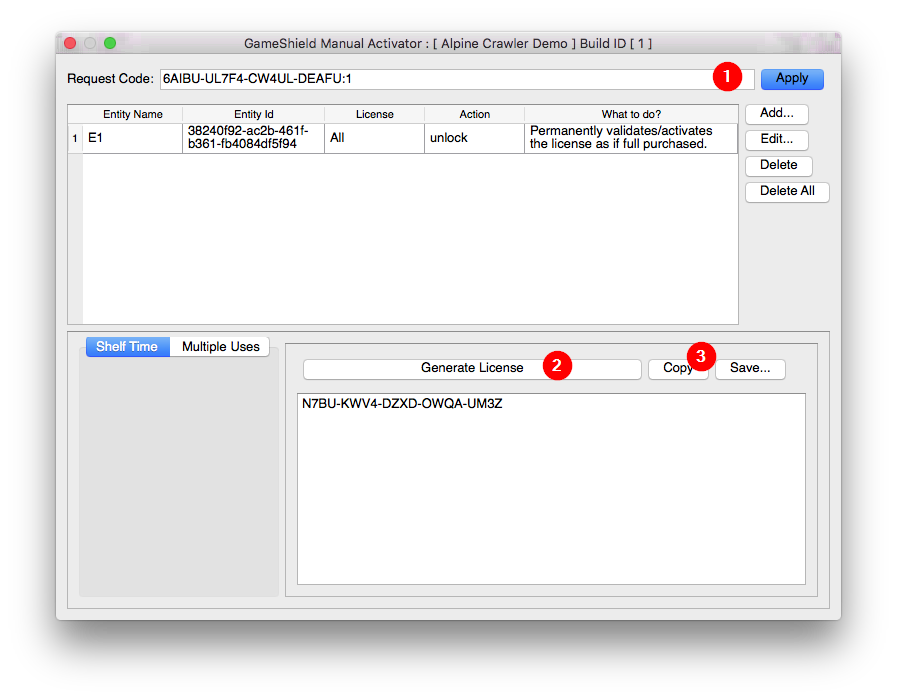
The manual activator is a standalone application automatically generated for each project build ( Release/KeyGenerator/mac/gsManualActivator.app ), it can be used to generate license code with any set of license actions:
- Copy and paste the request code ("6AIBU-UL7F4-CW4UL-DEAFU:1") to "Request Code" text box, and clicks "Apply" button;
- Press "Generate License" button, the license code ("N7BU-KWV4-DZXD-OWQA-UM3Z") is generated;
- Click the "Copy" button to copy the license code to system clipboard;
Now we can close the Manual Activator and switch to the previous offline activation screen, paste the license code:
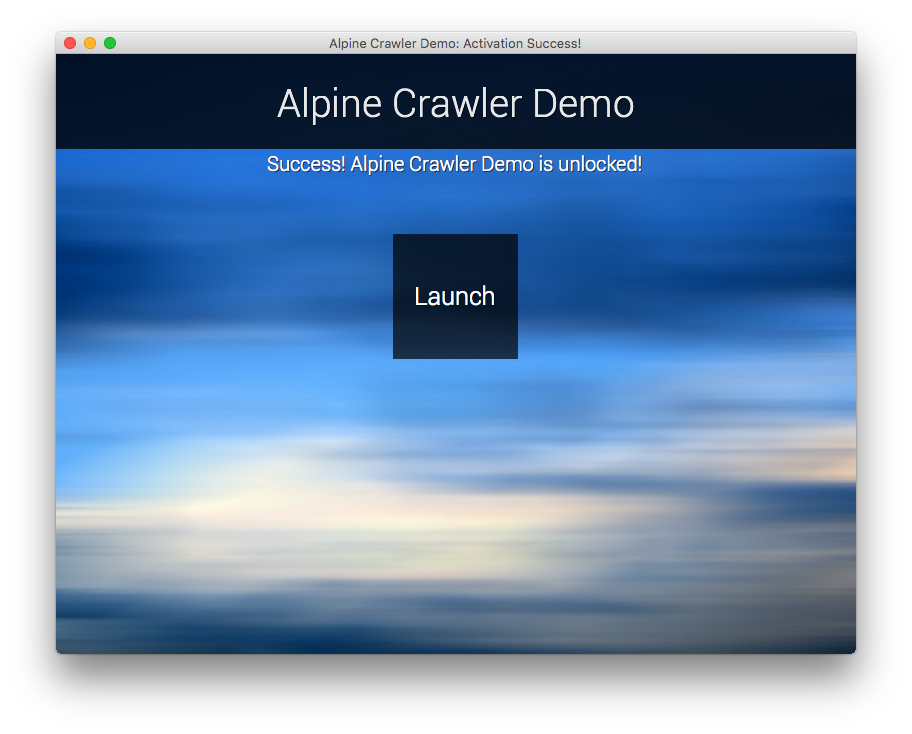
Clicks "Activate", the game should be activated immediately:
Upload Project
In the tutorial so far, we have demonstrated that the game can be wrapped and activated with offline license code properly. In this section we must upload the license project so that we can test online activation with a serial number.

The license project publish dialog box pops up, input your CheckPoint License Management Web Portal account and click "Publish" button:

If everything is ok, you should get a positive feedback:
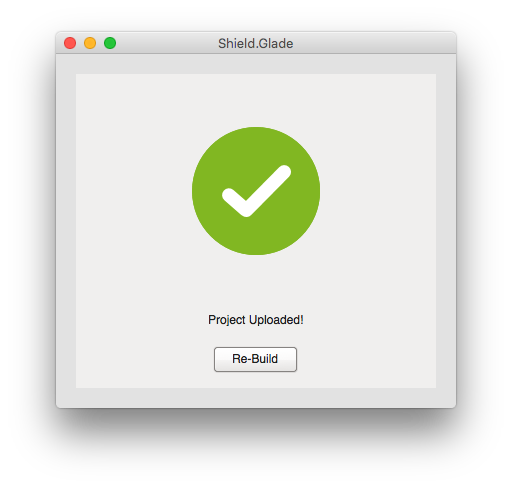
Now that your license project has been published to the license server, it must be rebuilt to reflect this change and the new build will support online activation.
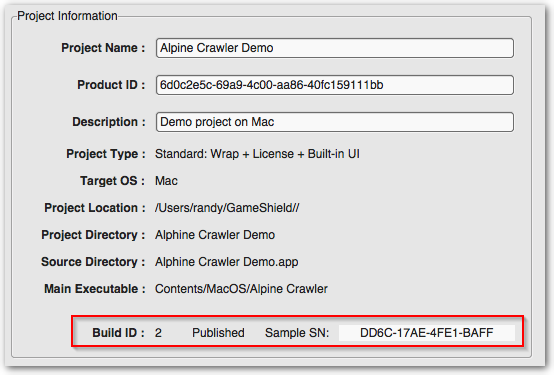
As a result, the build-id is increased to "2", the project is now Published, and we get a sample serial number for QA: "DD6C-17AE-4FE1-BAFF".
Test Run 2: Online Activation
Launch the game again, this time you will see the "Transfer" button is visible --- license transfer feature in built-in UI template is only supported by published project.
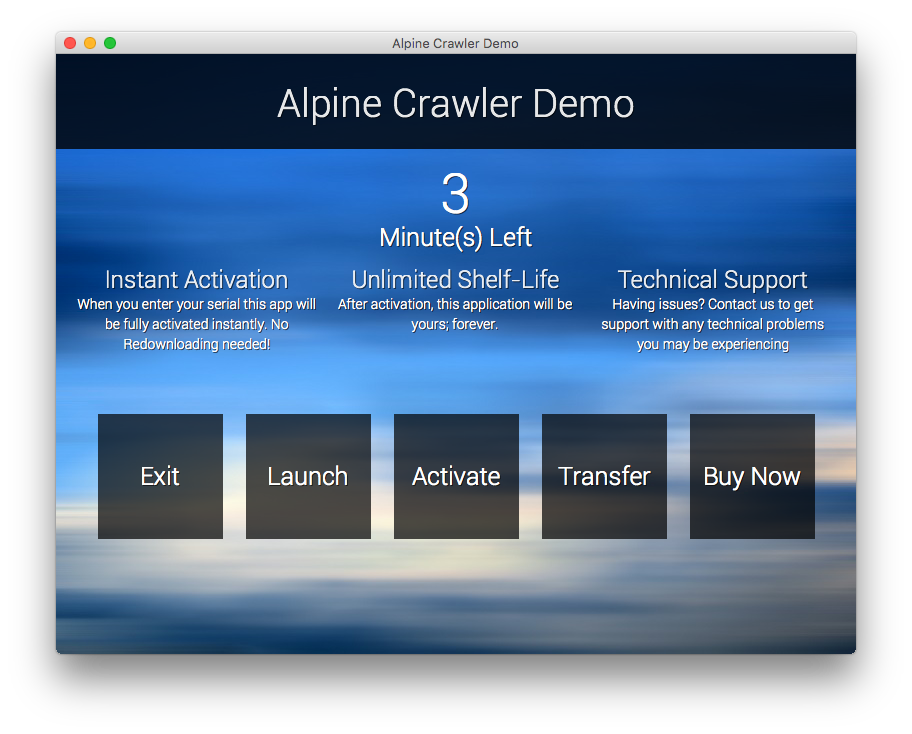
Click "Activate" button:
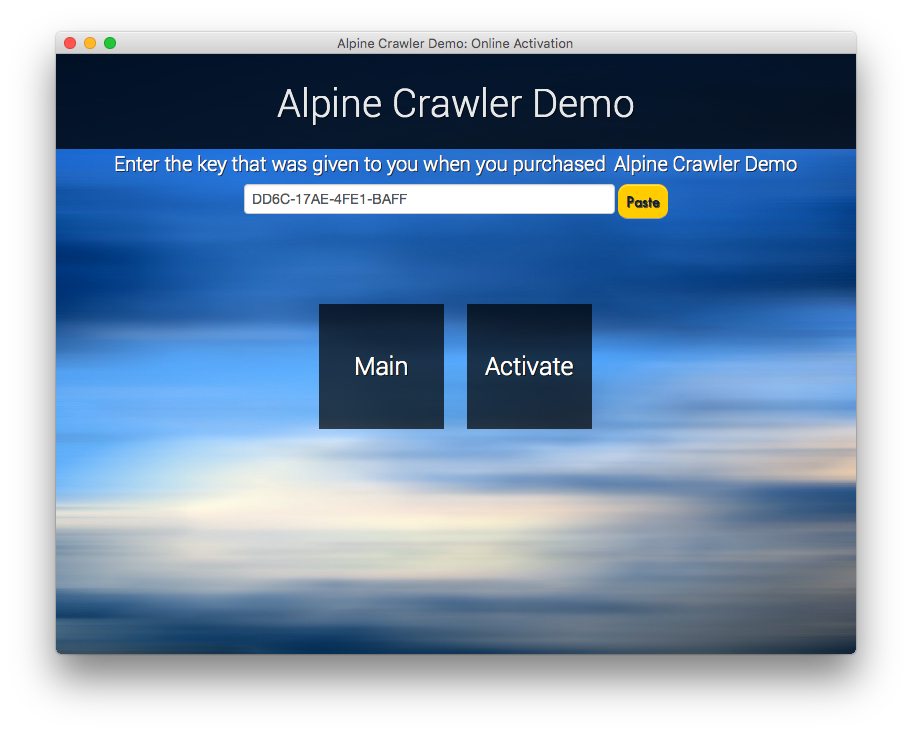
Click the "Paste" button to paste the sample serial number, and click "Activate" button:
